Sunday, November 28, 2010

Teaching Thankfulness: Focus on Others

Mom's Thanksgiving Table


Thanksgiving has come and gone in a blink of an eye and despite my promises to post lots of ideas, our personal plans for the holiday changed at the last minute and we left town in a flurry of activity.  OK, I could have carved out some time to post on Thanksgiving day but after the "Turkey Trot" fun run, stuffing ourselves with turkey and mashed potatoes and that glass of red wine, I was unable to get off the couch and do something productive.  If you were waiting in anticipation for fun ideas, I apologize, but I decided to post some of my ideas anyway.  We have the whole holiday season to focus on the blessings in our life and shouldn't we cultivate hearts of thankfulness all year round?


Each year we have a tradition where the grandchildren in the family
name the Thanksgiving bird.  Here we are carving "Tarzan the Turkey."


So, for those of you in the states, I hope you enjoyed your turkey and dressing and for the rest of you, maybe these ideas will fit in with your holiday celebration.

I mentioned in my last post, though it seems the holiday is mostly about food, the true tradition of Thanksgiving is rooted in the history of our country and the cooperation between two groups of people.  It is about people who endured great hardship and still found gratitude in their hearts for all that God had done for them.  With the food, parades and football games taking up a good chunk of time, I hope you all were able to focus on your blessings, even those who are in the midst of trials. 

If this week passed too quickly, as it often does, in a whirlwind of eating, shopping and travelling from city to city, then maybe this week will be a better time to count your blessings.  When we turn our focus outward, we naturally take our minds off ourselves and seeing those in need reminds us of all we have.  So consider serving at a soup kitchen with the kids or visiting a nursing home.  Sing carols in a poor neighbor and distribute hot home baked bread.  Love on the elderly or infirmed members of your family with special deliveries of sweets or holiday decorations.  

Here are a few ideas the Walls family are doing:


Alexandra's "shoebox" for Operation Christmas Child

GIVE TO CHARITY:
In our family, we use Dave Ramsey's "commissions" method for allowances.  Each child earns money for chores and responsibilities they have in our home.  They are required to divide their earnings into three categories:  SAVE, SHARE and FUN. 

They have freedom to spend "fun" however they want.  They can save it for big items or spend it when the ice cream truck makes it's rounds in the summer.  "Save" goes in the bank for long term savings and "share" goes to charity.  They also have freedom to whom they give their "share" money.  We ask them to pray and let God lay the burden on their heart.  Often we save the "share" money during the year and spend it around the holidays.  This year, Alexandra chose Operation Christmas Child, an excellent charity that send shoe boxes full of gifts to children around the world.


INTERVIEW GRANDPARENTS/GREAT GRANDPARENTS:
Have the kids write down questions they would like to ask their grandparents or great grandparents.  It can focus on their childhood...games they played, what they did for fun, what life was like for them or how the world has changed.  They can ask questions about holiday traditions.  Video record it for posterity.


DELIVER TREATS TO THE NEIGHBORS:
Make homemade goodies and take them door to door.  The Walls family has been know to sing a few carols along the way. 

Homemade Chex Mix


CREATE A BLESSINGS BOX:
We are working on this today so I don't have pictures yet.  I will post soon.  Have each person in your family write down five things for which they are thankful to God.  Encourage them to be creative. Food, shelter, freedom, family are all excellent answers but encourage descriptive answers.  Not just "dad" but "a dad who goes fishing with me every Saturday".  If your children are too small, write their answers for them.  Trust me, you won't have to tell them to be creative, it comes naturally!!  Then every day in December read a card at dinner time and say a prayer of thanksgiving and see gratitude cultivated in every one's hearts!  Even Mom and Dad!


Monday, November 22, 2010

Teaching Thankfulness: Consider the First Thanksgiving


What a wonderful celebration we will enjoy this week!  An American holiday, Thanksgiving is a time for remembering the "First Thanksgiving" celebrated long ago as well as a time for focusing on all God's blessings. 

On the last Thursday in November, turkey, dressing, mashed potatoes, sweet potatoes and pumpkin pie, just to name a few, will cover dinner tables all over the United States as we sit down with family and friends to consider all the blessings we have received during the year.  What does this celebration mean to you?  Do the children in your family know the history of the "First Thanksgiving?  Do we spend time being thankful along with enjoying a perfectly roasted bird? 

This Thanksgiving week I would love to share ideas on how to encourage "grateful hearts" in your home with ideas that may become new family traditions.  The idea is not to do everything but to pick something that works for your family.  Consider the ages of your children, the distance you have to travel, the amount of people you are hosting before adding something new to your routine, but I would love for us all to consider new ideas for encouraging gratefulness in ourselves and our children.  Maybe one of my ideas will spark a new idea or maybe you would like to share your own ideas here on the blog.  I would love for you to share with us some of your own family traditions!

I will give a few fun ideas every day, so check back often!


CONSIDER THE FIRST THANKSGIVING...
In 1863, President Abraham Lincoln officially made Thanksgiving a national holiday as a time to give thanks to God for all the blessings He had given and to remember the "First Thanksgiving" celebrated by the Pilgrims, who voyaged on the Mayflower from England in 1620 and the Native American (Indians) Wampanoag tribe, who helped the Pilgrims survive.


READ ABOUT THE FIRST THANKSGIVING
We have several books that we pull out each year to read about the pilgrims and their voyage on the Mayflower.  Reading about all the hardships these men, women and children faced helps us to remember how blessed we are now.  We found our copies at Barnes and Noble, which has a great display each Thanksgiving.


HOST A FAMILY PLAY
Dress the kids up using paper sacks, feathers, construction paper and other inexpensive items and read the story from a simple children's book.  Small children can act out the scenes.  Put the older kids in charge of the whole production... they can direct, produce and narrate...which gives them something to do and helps everyone feel involved.  Plus Grandma and Grandpa really enjoy seeing the grandchildren perform!


MAKE PILGRIM HAT COOKIES
This is a fun and easy recipe that even little children can do.  Your cookies might be a little neater but it is fun for all ages to try.  No cooking is involved, just heating the chocolate.  There might be messy fingers but a few licks will take care of that.


Marshmallow Pilgrim Hats

24 chocolate-striped shortbread cookies
12-ounce package of chocolate chips
24 marshmallows
tube of yellow decorators' frosting


1. Set the chocolate-striped cookies stripes down on a wax-paper-covered tray, spacing them well apart.


2. Melt the chocolate chips in a microwave or double boiler.


3. One at a time, stick a wooden toothpick into a marshmallow, dip the marshmallow into the melted chocolate, and promptly center it atop a cookie.


4. Using a second toothpick to lightly hold down the marshmallow, carefully pull out the first toothpick.


5. Chill the hats until the chocolate sets, then pipe a yellow decorators' frosting buckle on the front of each hat.

Tuesday, October 19, 2010

Grilled Citrus Basil Salmon with Pinapple Salsa

Grilled Citrus Basil Salmon


Since this is the Growing Gourmets blog, most of my recipes are family-friendly. I love to post recipes that the whole family can enjoy, especially yummy, homemade comfort food. But we can't eat like kids all the time! Sometimes they need to eat like adults, or at least, sample something new even if it is not their favorite. Around our house we call this being a "taste treat tryer." Don't you love that!


In other words, you don't have to love it, you may not even have to eat all of it (depending) but you have to try it! I have strong opinions on this issue. I don't make them eat everything prepared exactly the way my husband and I like it, for one thing, we like really spicy food and I think a child's palette is different than an adult's, particularly when it comes to spice. However, it is not unreasonable to try something new, and even eat a few bites of it. If the food is healthy, put it on the plate. Just seeing it there all the time, can help them get used to the idea. If they need a little Ranch dressing to eat all those vitamin-packed raw veggies, I am OK with it. They are getting used to the taste and texture of those vegetables and one day they won't need the Ranch dressing. This is my opinion...not everyone will agree, but I always wanted my kids to eat fruits and veggies even if they had to have a small amount of something to dip.


So, last night we grilled out one of our favorite dishes, citrus basil salmon, and when my oldest son actually said "YES!" as his reaction to finding out what was being served for dinner, I nearly cried. The pickiest child in our house was celebrating the fact he was being served grilled salmon for dinner. So take heart my young-mom friends, there is hope. It only took thirteen years...not too shabby!


This salmon recipe, including a version of the pineapple salsa, came from a dear friend of mine. The recipe is long lost, but I know the basic ingredients by heart, I've made it so often. Last night we made it into a salad with balsamic vinaigrette and fresh sliced avocado. So good!


Grilled salmon with pineapple salsa and avocado salad


Grilled Citrus Basil Salmon
1 1/2 lbs Fresh Atlantic Salmon fillet
juice from 2 orange
juice from 1 lemon
8 large basil leaves, minced
1 tablespoon olive oil

Combine all the ingredients in a shallow baking pan. Place salmon, upside down on top of the juice mixture and marinate the salmon in the refrigerator for 20-30 minutes.

Lightly oil the grill rack, two-sided grilling basket or aluminum foil. Grill salmon over medium heat, starting on the skin side. Cook the fish until opaque, turning once during cooking. This will not take long, about 8 to 10 minutes, so watch it carefully. Make sure that no flame touches the fish directly. We prefer to keep the skin on while grilling because it holds the fish together. Then we remove it before serving.


Pineapple Salsa
1 cup fresh pineapple,chopped
1 tomato
1 tomatillo (optional)
1/2 Serrano pepper, minced
1 tablespoon fresh cilantro, minced
juice of 1 lime

Combine all ingredients in a small bowl and refrigerate until fish is ready. The salsa just gets better with time as the flavors marinate together.


ARRANGE SALAD:
Toss fresh butter or bibb lettuce with your favorite balsamic vinaigrette. Layer on a plate and top with a slice of fresh grilled salmon. Cut several slices of avocado and place them around the fish. Top the salmon with a tablespoon or two of the fresh pineapple salsa. Enjoy. Serves 4-5 people.


Sunday, October 10, 2010

Spiced Caramel Apple Cider

Spiced Caramel Apple Cider


I have many recipes for different versions of apple cider like candy apple cider, wassail and my mom's percolator punch, but I wanted to try a sweet version of caramel cider.  My kids thought it was good, hope yours will too.  Enjoy!


Spiced Caramel Apple Cider

6 cups apple cider
1/2 cup prepared real caramel sauce
1/2 cup half and half
1 teaspoon cinnamon
1/2 teaspoon nutmeg
10 cloves

In a medium saucepan, combine the the caramel and half and half over medium heat.  Continue heating until caramel and half and half are combined.  Add the apple cider and spices and simmer on low for 10 minutes.  Scoop out the cloves with a strainer.  Pour into mugs, top with whipped cream, cinnamon and drizzle a little of the caramel sauce on top.

Saturday, October 9, 2010

Pumpkin Scones with Maple Glaze

Pumpkin Scones with Maple Glaze


I have always loved to mix up concoctions in the kitchen.  That's the word I used for the original recipes I created as a child and then bullied my younger sister into sampling.  She still talks about the time I made "cookies" by mixing bran flakes, peanut butter and honey.  I rolled this concoction into balls and refrigerated them.  You know, they might not have been that original but they didn't taste half bad.

Ever since childhood, I have been mixing and measuring, dreaming up new ways to create tasty treats in the kitchen.  It is a genuine hobby, and like I tell the children in my classes, we mix a little science and a little art to make magic!

Rows of yummy goodness.


I am grateful that I had lots of inspiration in my life including a little sister who was mostly willing to be brave and try what no one else was willing to try.  I should add that she is now an excellent cook in her own right.  More than anything in the world, I love going to her cozy house and sitting in the kitchen while she whips up treats for me!  I am supremely thankful for a mother who let me talk and talk and talk her ear off while I stirred whatever dinner she was making.  A ritual that we still participate in today and I am happy to say she still has both her ears.  My dear grandmother, Nini, who sat me down in college and helped me copy all the family recipes on cards for my own collection.  And my other dear grandmother, Grandma, who sifted through her family recipes and photographs and made a family cookbook.

Add in all the aunts, cousins, college roommates, coworkers, neighbors and friends and you begin to piece together your life by the recipes you've collected.  When I pull out my recipe box, it is a trip down memory lane, like an episode of "This is Your Life" each recipe is a reminder of the dear person who shared it with me.

So this beautiful Fall morning with sun shining and coffee brewing, I played in the kitchen, mixing this and adding that, and out came warm, slightly sweet and tempting pumpkin scones.  This recipe was created by me for you and I hope it will be good enough to find it's way into your recipe box!


Pumpkin Scones with Maple Glaze

Scones
2 cups flour
1 tablespoon baking powder
2 tablespoons sugar
1/2 teaspoon salt
1 teaspoon pumpkin pie spice
6 tablespoons butter, cold and cut into small pieces
1/2 cup buttermilk
1/2 cup pumpkin, canned puree not pumpkin pie filling
1 tablespoon molasses

Maple Glaze
1 cup powdered sugar
3 tablespoons pure maple syrup
1 tablespoon half and half


In a large bowl, mix together flour, baking powder, sugar, salt and pumpkin pie spice.  Add the butter and cut into the flour mixture using two forks until the mixture resembles course meal. 

Make a well in the center of the flour mixture and pour in the buttermilk, molasses and pumpkin.  Mix until just combined.  The dough should be thick.  Turn out onto a floured board.  Dust flour on the top and roll out to 3/4 to 1 inch in thickness. 

Using a fluted biscuit cutter, cut into rounds and place on a cookie sheet.  Bake in the oven at 400 degrees Fahrenheit for 10-12 minutes or until orange-brown in color and firm to touch.

While the scones are baking, mix the powdered sugar, maple syrup and half and half in a small bowl.  You want the glaze to be thick because it will melt onto the warm scone.

Remove scones from the oven and top with glaze.  Eat immediately.

Makes about 15 scones

Thursday, September 30, 2010

Nini's Crispy Cheese Crackers

Nini's Crispy Cheese Crackers


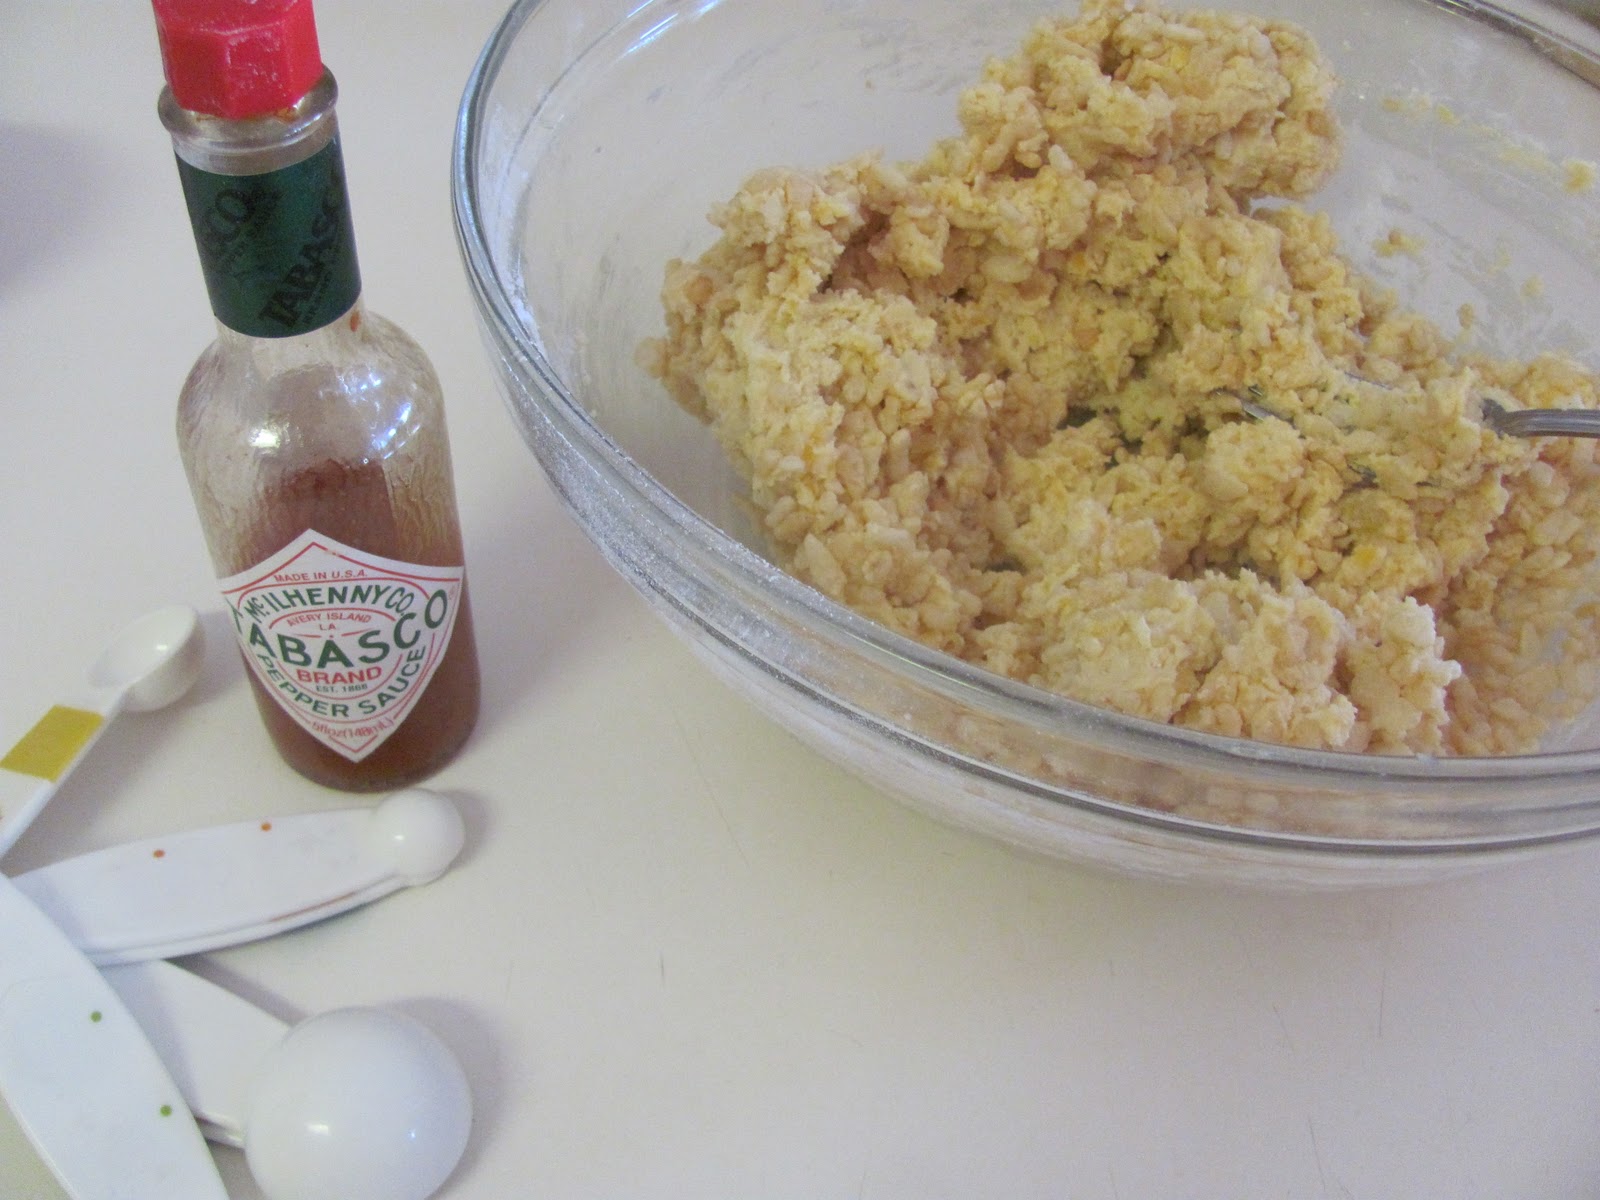
My grandmother, Nini, makes these yummy homemade cheese crackers every Christmas.  It is a tradition in our family.  Amidst all the sweets, it's nice to have something savory on which to snack.  I always enjoyed eating these cheese crackers and homemade chex mix late at night while watching old Christmas movies like "It's a Wonderful Life."  When I eat these crackers I actually think about that famous line, "every time a bell rings, an angel gets his wings".  I don't know how theologically sound that is, but it makes me smile when I think about it.  That movie holds special meaning to me for several reasons, but I will have to expound on another day.  Back to the cheese crackers.  They also make a great addition to cheese and wine.  They taste like cheese straws, but the addition of Rice Krispies makes them crunchy!  Nini's recipe uses a shake of cayenne pepper which is awesome but I have been on a Tabasco kick lately so I substituted and these turned out really well.  You can choose your poison. :)

Nini is a wonderful cook who still makes our cornbread dressing each Thanksgiving for the entire extended family.  There is nothing like traditional, southern cornbread and nobody makes it better than Nini.  She actually got her name from me. :)  I am the first grandchild on my Dad's side of the family and everyone tried to get me to say "granny."  All I could say was "nee-nee" hence her new name.  (Maybe I was a little slow as a toddler.)  I can't imagine her with any other name.  I love her very much and am happy to share one of her many delicious recipes with you.


Nini's Cheese Crackers

2 sticks butter
2 cups grated sharp cheddar cheese
2 cups flour, sifted
2 cups Rice Krispie cereal
1 teaspoon salt
Tabasco Sauce to taste

Allow the butter and cheese to come to room temperature.  Cream the butter and cheese together in a large mixing bowl.  Add several shakes of Tabasco sauce.  Add flour and salt and continue to mix until combined. 

Taste a little dough...is it hot enough?  If not, add a few more shakes of Tabasco.  Add the Rice Krispie cereal and mix until just combined.  Roll the dough into quarter size balls and press them flat on a cookie sheet using the back of the fork.  Bake at 350 degrees F for 10-15 minutes or until crispy and golden.

Saturday, September 25, 2010

Chocolate Almond Caramel Corn

Chocolate Almond Caramel Corn


Crunchy, sweet, a little salty and then you add the chocolate.  I had a craving for "moose munch."  You know, the caramel corn made by Harry and David.  It's so good but I rarely ever buy it because I will eat the whole thing in one sitting.  And it is a little expensive.  I have to admit, it's worth the price, but yesterday I had a whim.  I started thinking how fun it would be to make my own.  Yes, this is the talk of a crazy foodie who sits around thinking about recreating recipes that are readily available at the store.  I am sure it would be simpler to go buy a bag, but not near as fun!


A big bowl for guests!


So, I will walk you through the simple steps of making my Chocolate Almond Caramel Corn.  The best part is that it's fairly inexpensive to make.  It makes a large batch which would be perfect for a holiday party, guests in town or even better, pour into little glassine bags and tie with ribbons for a great teacher gift.  I think I'll make "trick or treat" bags for friends and neighbors.

Individual bags of my Chocolate Caramel Corn


This is a two step process- first you make the caramel corn.  Next you add chocolate.  The caramel corn is good enough to eat on it's own.  The chocolate is just an added bonus.  I added almonds.  You can use almonds or pecans or peanuts or macadamia nuts.  I chose dark chocolate.  You might choose white chocolate or milk chocolate.  The combinations are endless.  I think white chocolate, almonds and dried cherries would be good.  But my favorite will always be dark chocolate with almonds.  It may be difficult to have the kids help with making the caramel corn, but they could certainly help with the chocolate, if you don't mind messy fingers!  So, good luck and enjoy.  Be careful, though, it's really hard to stop eating!


Chocolate Almond Caramel Corn

1 cup butter
1/2 cup corn syrup
1/2 tsp baking soda
2 cups brown sugar
1 tsp salt
1 tsp vanilla
6 cups of popped corn (about 3 bags- I used kettle corn)
1 cup roasted, salted almonds
6 oz good quality chocolate (I like Scharffen Berger semi-sweet bar)


Preheat your oven to 250F. You will need two cake pans or one large 1/2 sheet pan for slow cooking the caramel corn.  Pop the corn and pour the bags into a large bowl.  Shake the bowl to release any unpopped kernels.  Most of these will fall to the bottom of the bowl.  Scoop out the popped corn and lay it in the pan. Sprinkle the cup of almonds evenly over the corn.

Next,  melt the butter on the stove over medium heat.  Stir in the corn syrup, sugar and salt. Bring the mixture to a boil stirring constantly. Boil without stirring for 3-4 minutes.  (The original recipe said you should let boil for 5 minutes.  I tried it twice and both times 5 minutes would have been too long.  My caramel would have burned.  You want a nice rich caramel color- not dark brown. So watch carefully.)


Remove from the heat, stir in the soda and vanilla (Careful, it foams!). Pour over the popped corn and mix well. The caramel is very hot.  You'll be tempted to use your fingers, DON'T!  Use a spatula.  The caramel will melt and coat the popcorn more evenly as it bakes in the oven. Bake for 40 minutes, stirring every 10 minutes. Let it cool.


In a small bowl, melt the chocolate.  You can melt chocolate in the microwave if you heat in 20-30 second intervals, stirring in between.  Over heating chocolate will make it seize up into a ball.  I used a high quality bar chocolate because it doesn't have the stabilizers in it like chocolate chips.  I think it melts better.  In fact, heat just one square first.  When it is melted, add the rest of the chocolate.  This will help temper the chocolate. 


Next, take chunks of the caramel corn and place in a small dish (approximately 2 cups worth).  Pour the melted chocolate over the caramel corn and stir until completely coated. Lay the chocolate chunks out on wax paper and leave in a cool, dry place to harden.  It make take several hours.  It is so humid in Houston that I had to refrigerate to speed the process.


When completely hardened, mix it with the big batch of caramel corn and store in an air tight container.  In theory, it should last for a couple of weeks, but you know, once you start it's really hard to stop!